Couriers
The Couriers section contains a list of all the couriers in your company. You can also view the routes planned for couriers.
Courier list
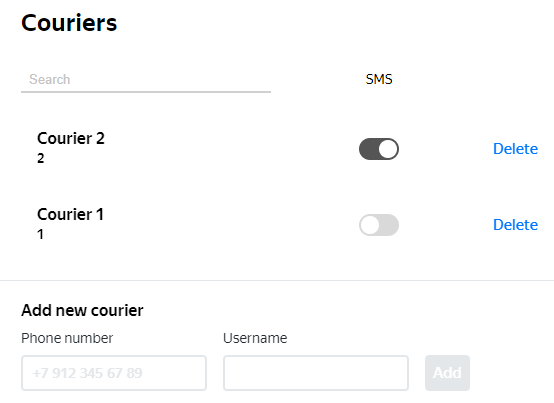
For each courier, you can enable or disable SMS notifications to customers about the status of their delivery. To do this, set the switch next to the courier's name to the desired position.
Managing the courier list
- Register a courier
-
Enter the new courier's phone number in
+1xxxxxxxxxxformat and their username, and click Add.If you use the courier's mobile phone number in
+1xxxxxxxxxxformat as their username, they will not have to enter a username to log in to the Yandex Courier app.For more information on adding a courier's phone number for the app, see Couriers.
- Open the courier card
- Click on a courier's username or phone number in the list.
- Delete a courier
- Attention. Once you delete a courier, they cannot be restored.
- Click
 in the row with the courier. If the deleted courier has planned routes and orders, Track & Trace displays “Courier deleted” instead of their username. Information about the deleted courier isn't displayed on the map. Buttons for contacting the courier won't be displayed on their routes and orders.
Courier card
- The courier's ID and contact information.
- Information about the courier's work on different days.
- The courier's route on the map.
- Information about where the courier was at a certain time.
- The list of orders delivered by the courier.
You can change or add a courier, change the route, and contact a courier via the chat.
Courier's work on a different date
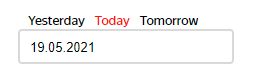
By default, the system displays information for today. To view the courier's work for a different date, click Yesterday, Tomorrow, or enter a specific date.
Change or delete a route
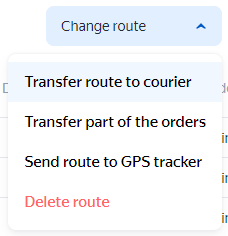
You can transfer an entire route to a different courier. To do this, click Change route → Transfer route to courier. If a specific courier isn't on the list, add them.
To transfer a route to a courier with a specific GPS tracker, click Change route → Send route to GPS tracker.
Transfer orders to a different route
You can transfer orders from one route to another if the courier can't complete all of their orders (for example, if their car broke down or there was a long wait at a pickup location).
To transfer the remaining orders to another courier's route:
- Go to the page of the route with incomplete orders.
- Select the orders that need to be transferred on the map.
- In the Change route menu, choose Transfer part of the orders.
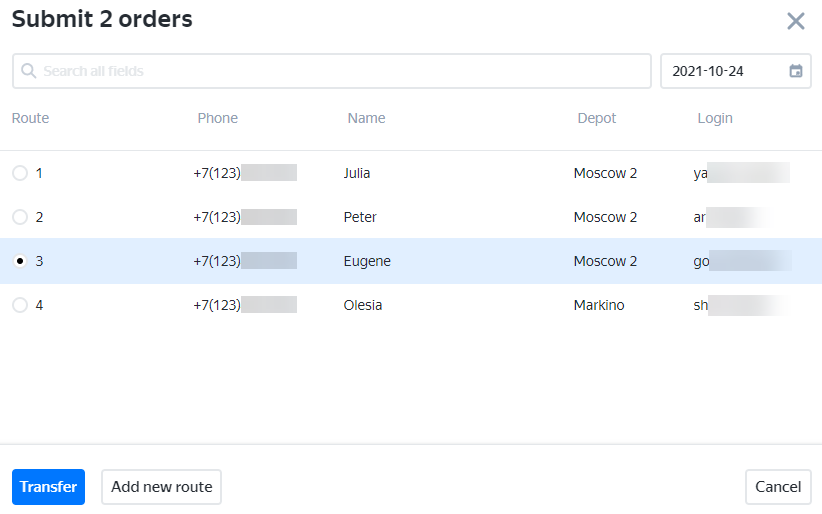
Choose a route to transfer the orders to:
To transfer orders to a new route, click Add new route.
To transfer orders to an existing route, use the fields in the search form:
- Route: Route name.
- Phone: Courier's phone number.
- Name: Courier's name.
- Depot: Depot that the route starts from.
- Username: Courier's username.
Click Transfer.
Both of the routes will change:
- Target route
-
- The transferred orders will appear.
- An extra location will be added to show the current location of the courier that the orders were transferred from.
- The route characteristics will be updated.
- Source route
-
- The transferred orders will be removed.
- Information about completed orders will remain.
Courier route information
While a route is in progress, you can see the time when the courier performed certain key actions: when the route was set, when the courier sent their current coordinates last, and when the courier returned to the depot.
- Route built
- The time when the courier sent their coordinates last.
- Coordinates sent
-
The time when the server received the courier's coordinates last.
For example, the courier visited the order at 17:00, but the internet connection on their device was lost and only restored at 17:10. At 17:05, the routing workspace dashboard won't show that the order has been visited. The manager will only see this information at 17:10, when the courier is online again and their device can send data to the Track & Trace server. In this case, the order visit time will be recorded as 17:00.
- Return to the depot
-
The Estimated Time of Arrival (ETA) that Track & Trace calculates every few minutes based on incomplete and non-canceled orders on the route. For more information, see Estimated Time of Arrival (ETA).
Calculation methodThe time the last coordinates were received added to the planned amount of time required to visit all the remaining locations on the route. Orders that break the sequence aren't taken into account. - Set start time
-
The route tracking start time. It varies depending on the planning method:
- API: The start time matches the route start time if it's set. If not, it's 5 hours before the start of the earliest order window.
- Interface: The start time matches the time when the vehicle leaves the depot.
- Importing a route from Excel: The start time matches the shift start time.
- Tracking end time
-
The route tracking end time.
If the time isn't specified, route tracking ends 5 hours after the last order's time window. If the function of extending tracking is enabled for the route, the specified number of extension hours are displayed in brackets. Example: 14:00 (+14h).
After the tracking end time, the route track isn't recorded.
Courier's location at a certain time
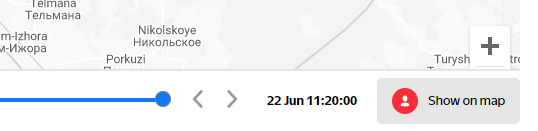
The blue slider under the map is active when a route has been started and after it is completed. By moving the slider, you can view the courier's location at different points in time. The exact time is displayed to the right of the slider. To see where the courier was at the selected time, click Show on map.
There is a limit on how long courier tracks are stored, see Data storage period for details.
List of stops in the route
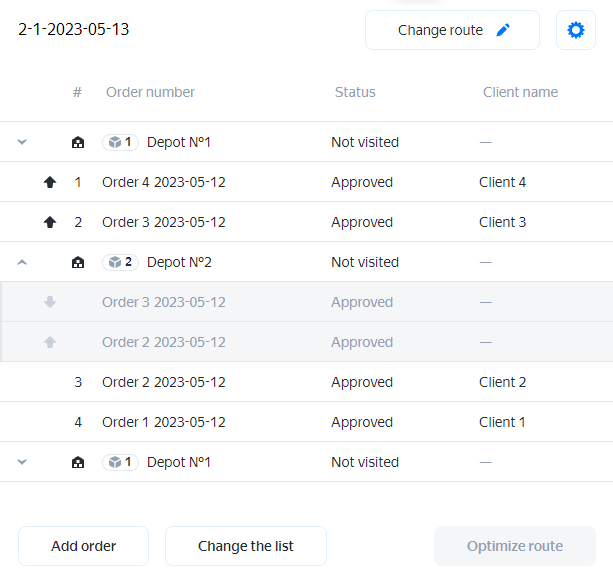
You can add an order to the route and change the stop sequence by modifying orders and depot visits. For stops at depots to be displayed on the list, enable the Show depots in Track & Trace option.
To view the list of orders that are to be picked up from or delivered to a depot, click the arrow. The number of orders is indicated on the icon next to the depot name.
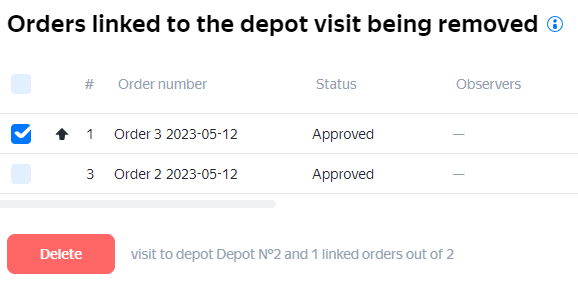
When you delete a stop at an intermediate depot, you're given the option to also delete orders assigned to that stop. You can delete part of the orders (by deselecting them) and leave others if you know that the remaining orders should be in this route.
When changing the sequence of orders, the depots they're assigned to must be taken into account: deliveries must come after a stop at the depot where the order is picked up, and before a stop at the depot where they're unloaded.
If the order sequence doesn't seem optimal, click Optimize route, and the route will be rebuilt. Note that you can't optimize routes with intermediate depots.
From the list, you can go to the order card.
Hover over the order location on the map. Brief order information will be displayed and the order will be highlighted in the list. If you hover over an order in the list, the order location will be highlighted on the map.