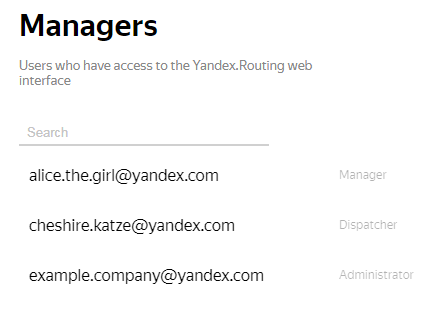
Managers
In this section, you can add new users who will get access to the routing workspace interface from your company, set up their permissions, or delete previously added users.
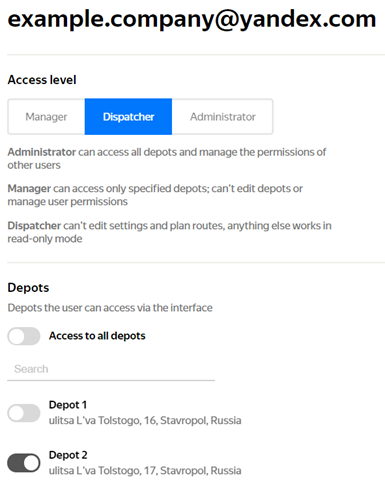
User roles
- Administrator
-
Manages the user permissions and depots. Has full access to all data.
- Manager
-
Manages couriers and plans routes for their depots. Cannot manage user permissions
- Dispatcher
-
Limited access. Manages couriers but can't plan routes. Other options are available in read-only mode.
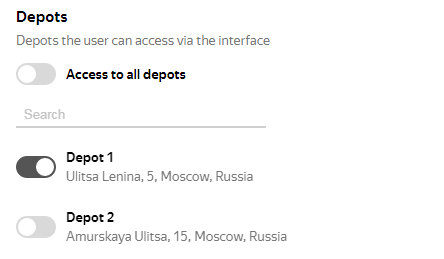
When you assign the Manager or Dispatcher role to a user, specify which depots and companies they should have access to.
User permissions
Permissions by role are shown in the table below. Symbols:
 – Has access.
 – Doesn't have access.
| Options | Administrator | Manager* | Dispatcher** |
|---|---|---|---|
| Assigning managers | | | |
| Company settings | | | |
| Adding phone numbers for couriers | | | |
| Working with routes | | | |
| Working with orders | | | |
| Working with couriers | | | |
| Planning and exporting | | | |
| Importing from Excel | | | |
| Reports | | | |
* — Can only access their own depots.
** — Can only access their depots in read-only mode.
Add users
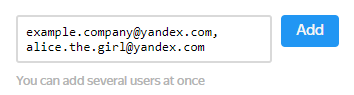
- At the bottom of the page, specify the new user's email address.
- To add multiple users at once, specify their email addresses separated by a comma.
Click Add.
Configure permissions
Open the user card.
Choose a role: Manager, Dispatcher, or Administrator.
When you assign the Manager or Dispatcher role to a user, specify which depots and companies they should have access to. To do this, select the required options in the Depots block. The employee will get access to routes that start from the selected depots.